Scheduled Activities
The Schedule section allows you to run reports at a given time or when certain conditions are met.
The report results can then be emailed to you or archived for later viewing. This allows you, for example, to receive automatic updates of critical Fixlet messages via email, or to regularly back up audit reports.
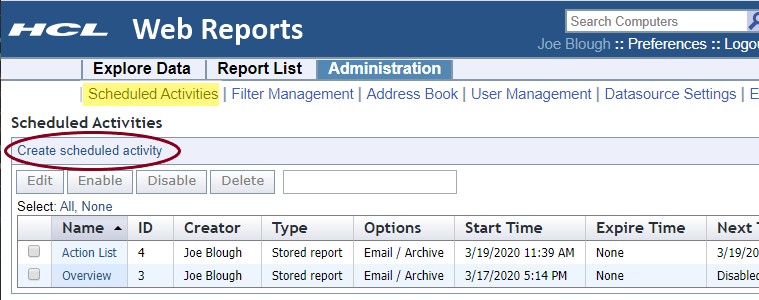
When you open this page, a list of your currently scheduled reports is opened. Click Create Scheduled Activity to add to the list.
Below the create link are some buttons. These are grayed out until you select one or more activities in the list below. The buttons include:
- Edit: Allows you to edit the properties of the scheduled activity.
- Enable: Allows the selected activity to perform on schedule. Used to reactivate an activity that you previously disabled.
- Disable: Prevents the activity from running until enabled again. This allows you to preserve the functions of an activity without actually running it.
- Delete: Deletes the selected (checked) activities.
You can select the items in the list by individually clicking them. You can also use the links at the top of the list to Select All or None.
The list has several columns, including:
- Name: The name of the activity, derived from the underlying report.
- ID: An incremental number assigned to each activity when it is created.
- Creator: The name of the activity author.
- Type: The type, either report or alert.
- Options: Describes the action, either email, archive, or custom.
- Start Time:The starting time of the activity, which is typically when you created it.
- Expire Time: The ending time of the activity, if you set one. Otherwise, it is open-ended and this column displays None.
- Next Time: The time when the activity runs next, unless the activity has been disabled.
- Period: The time period between scheduled activities. This can be any time from one minute to two years.